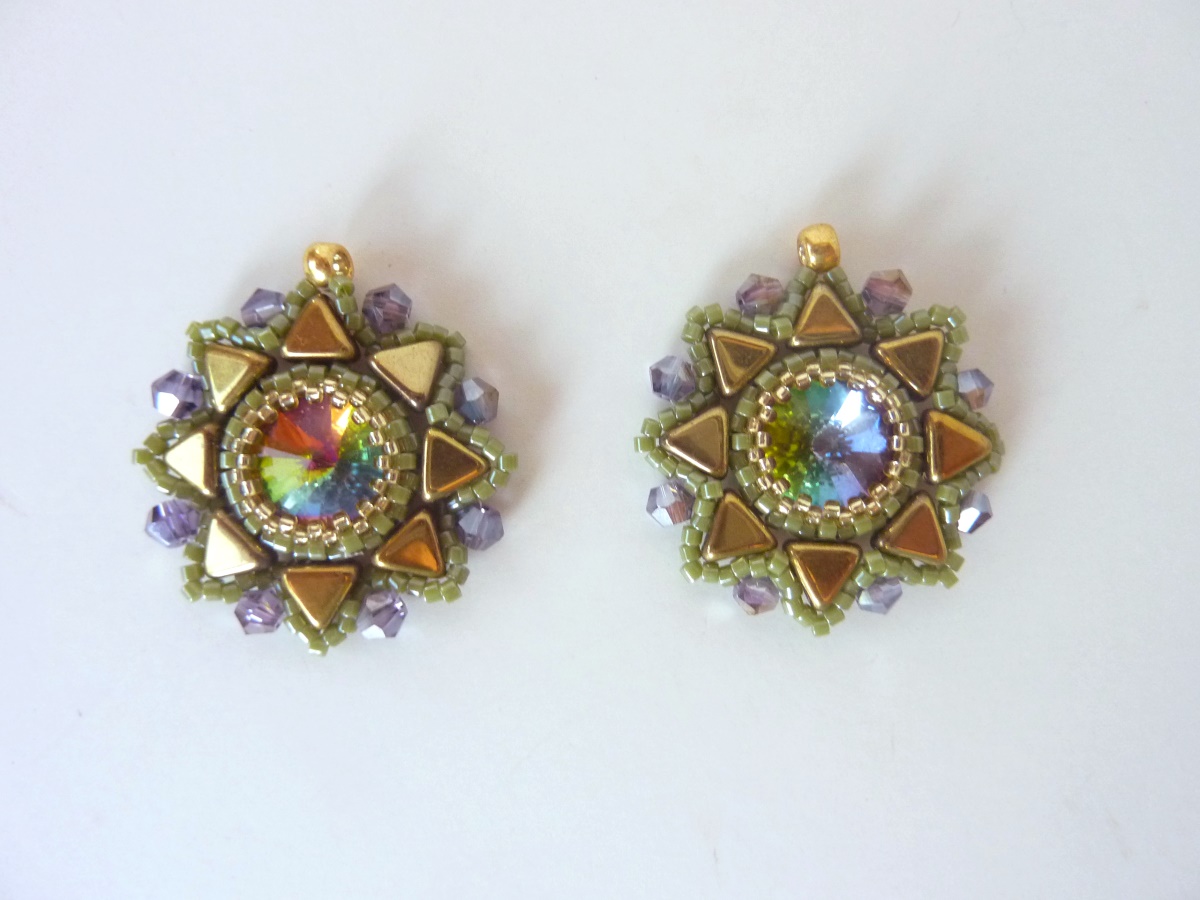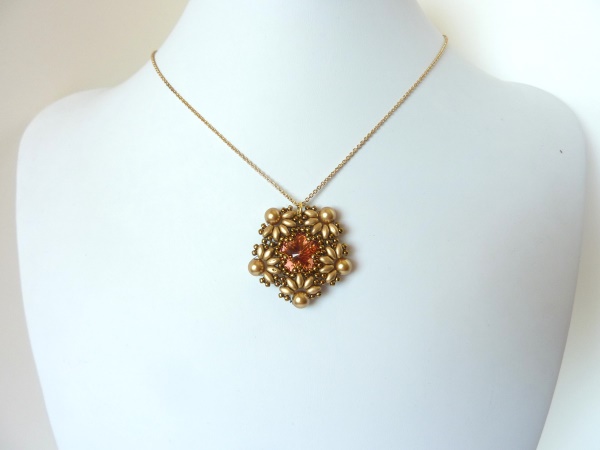
This is a lovely pendant design, which features a crystal rivoli inside a 5-pointed floral frame. The pattern requires a 14mm crystal rivoli, 6mm pearls or bicone crystals, Superduo beads, 11/0 seed beads, and jewelry glue for the last step. I experimented with larger (TOHO) and smaller (Czech) 11/0 seed beads, and both seemed to work equally well. I included a step at the end to glue the the rivoli back to its beaded cage in the back, because I found that with some of the pieces I made, the rivoli could pop out if you twisted the component hard enough. I used E6000 clear glue for that step (same as pictured in the Materials photo in my DIY Sweater Clip post). I was able to string the pendant on a chain by inserting a jump ring through the middle of one of the sides of the finished piece. I hope you enjoy this free beading pattern!

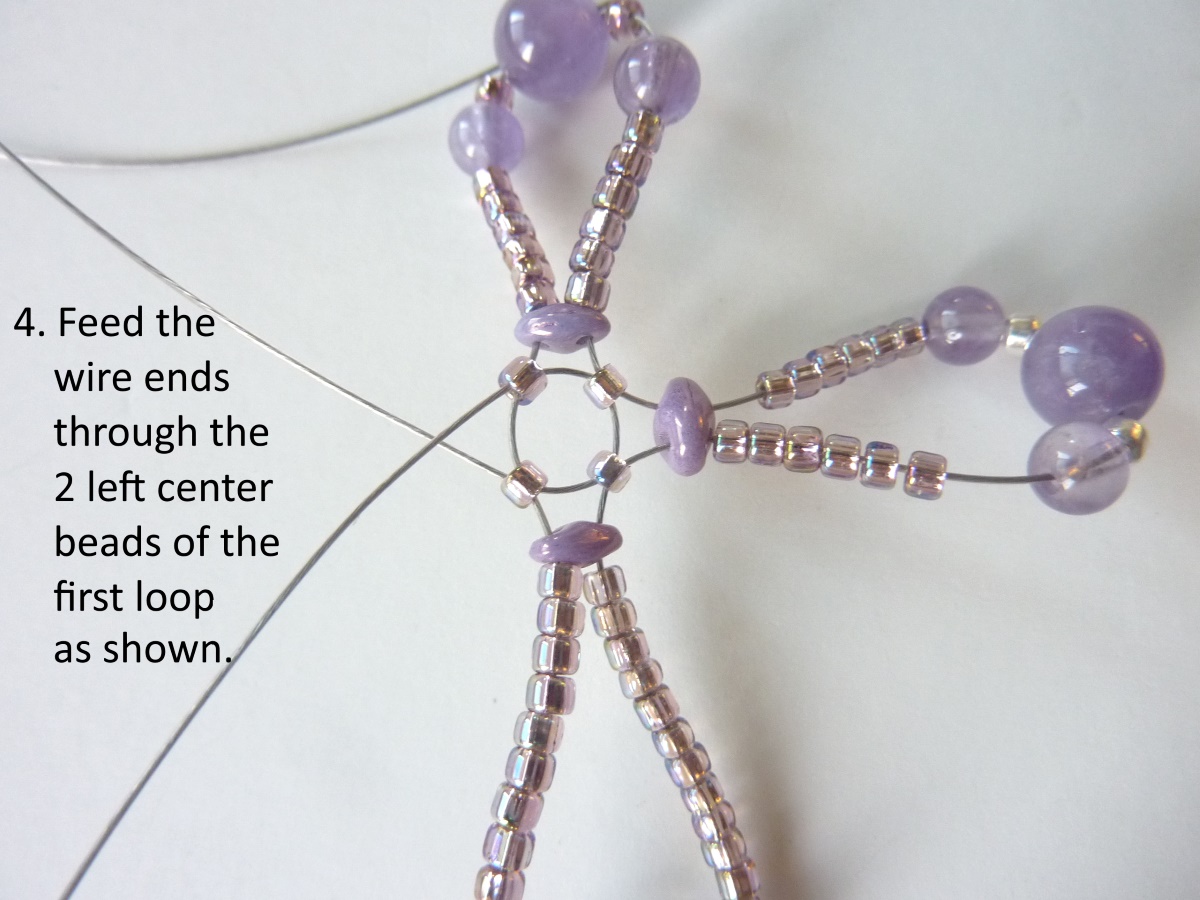
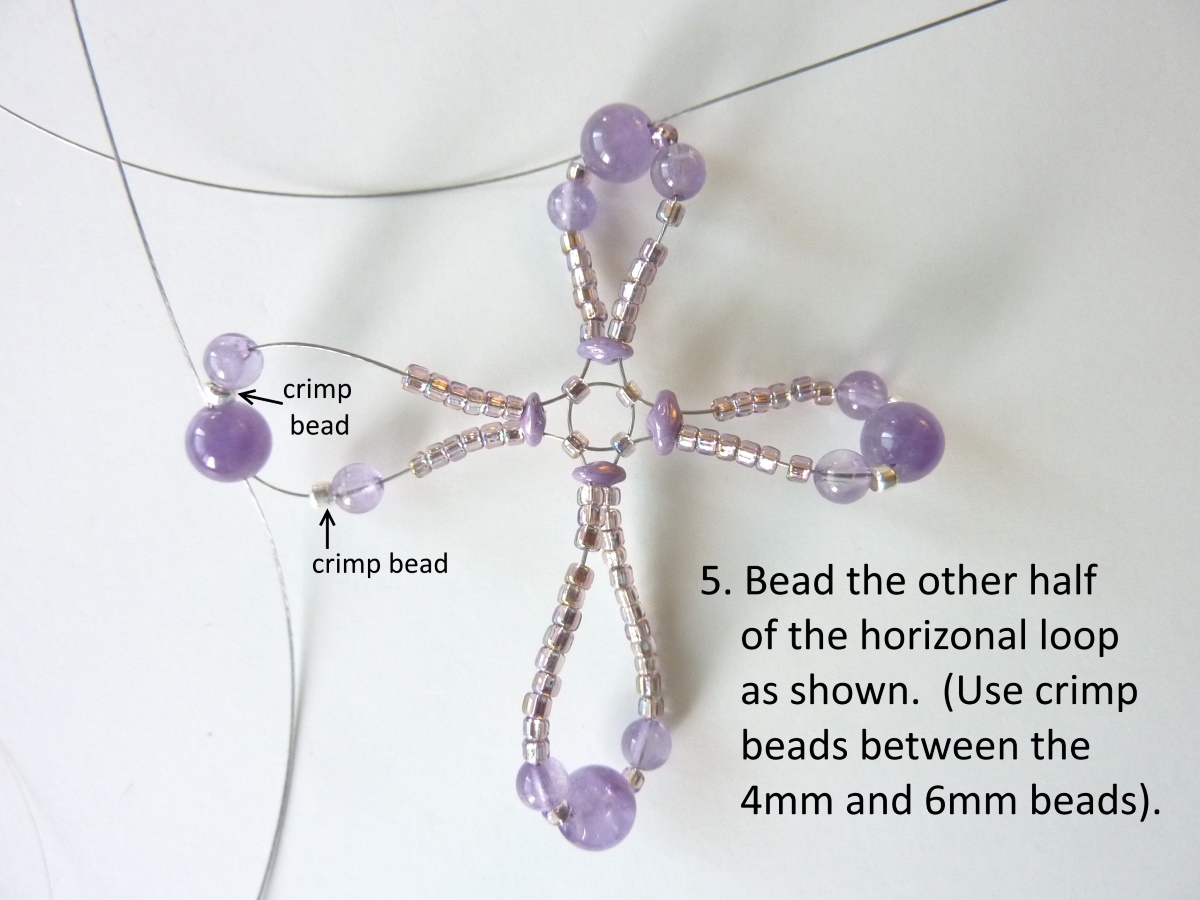
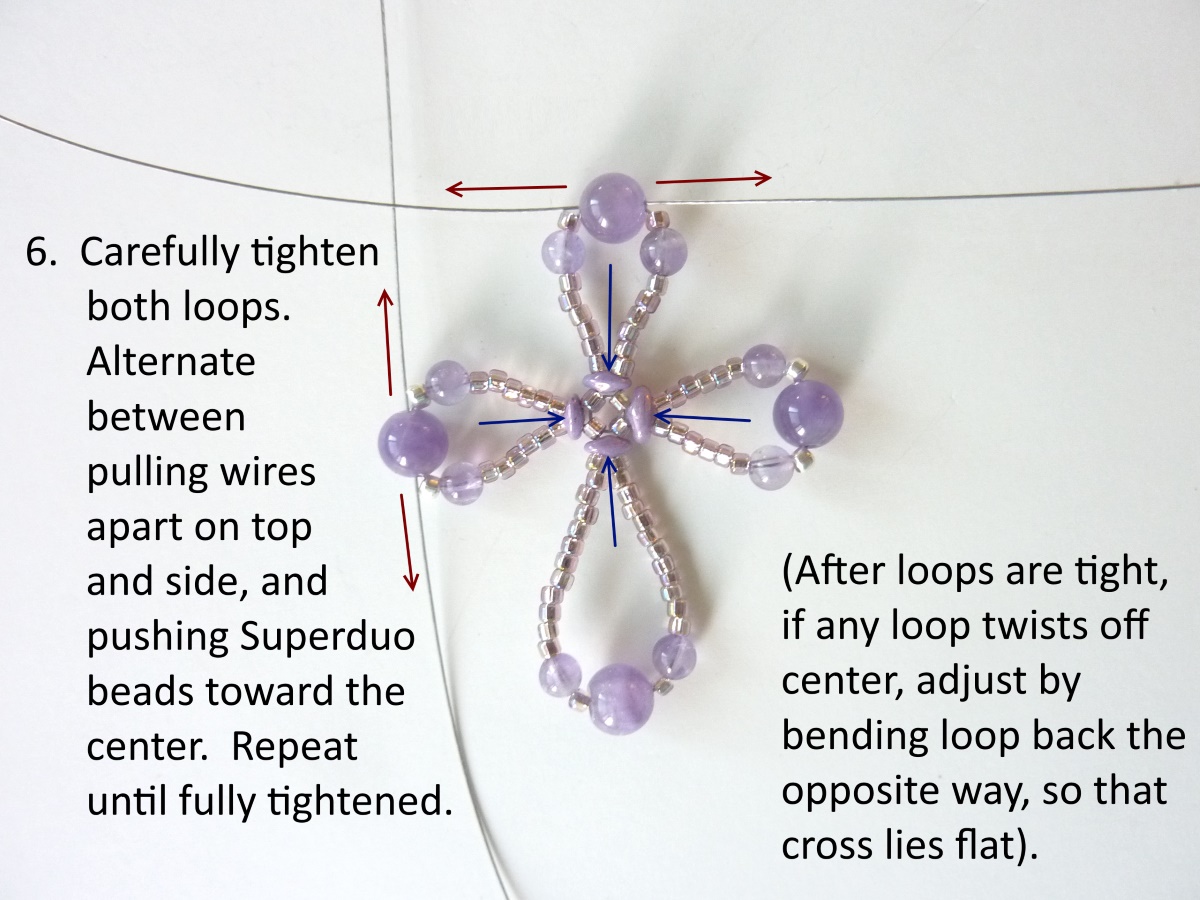
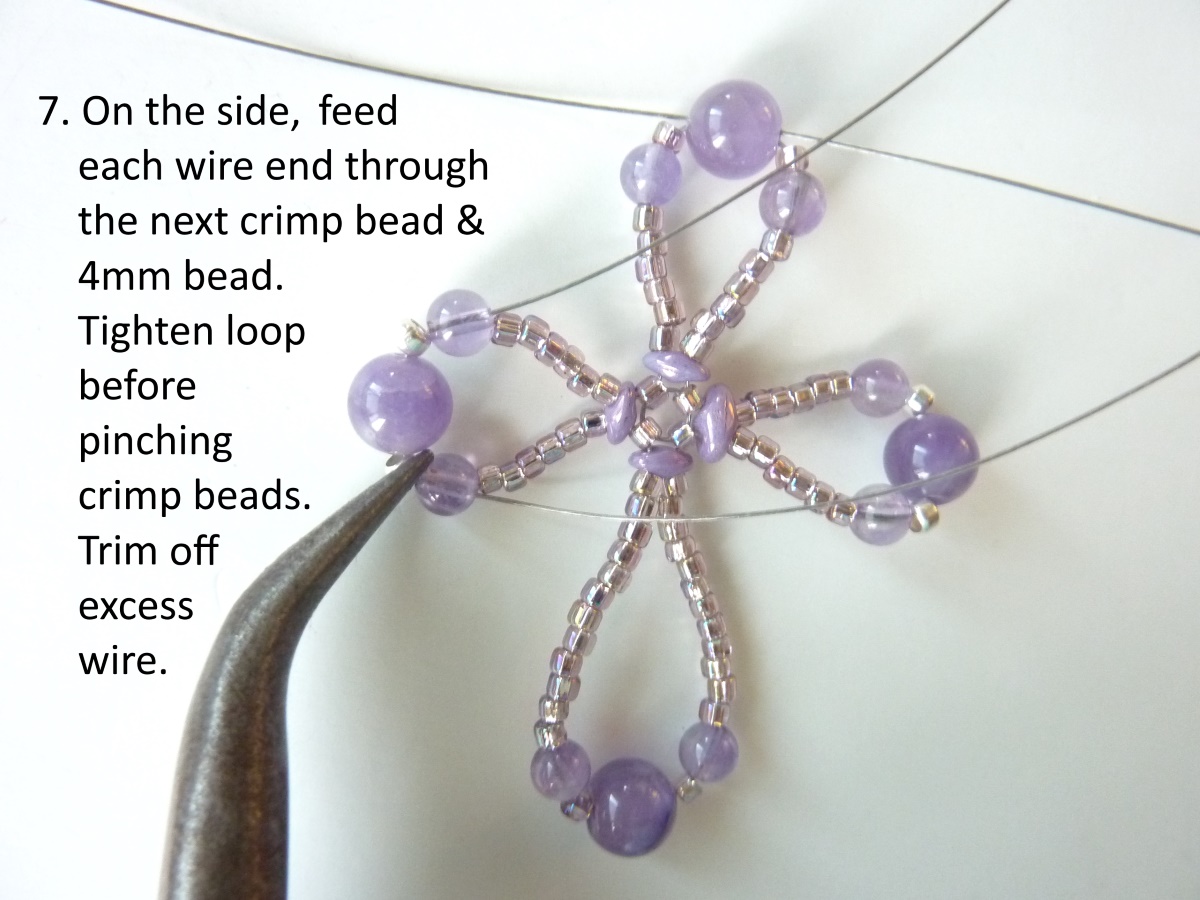
Click on the photos below (or the free beading pattern) to zoom in.
If you wish to print the pattern, download it in PDF format:
If you enjoy the free designs, tutorials, and downloads provided by BeadDiagrams.com, consider donating using Paypal!