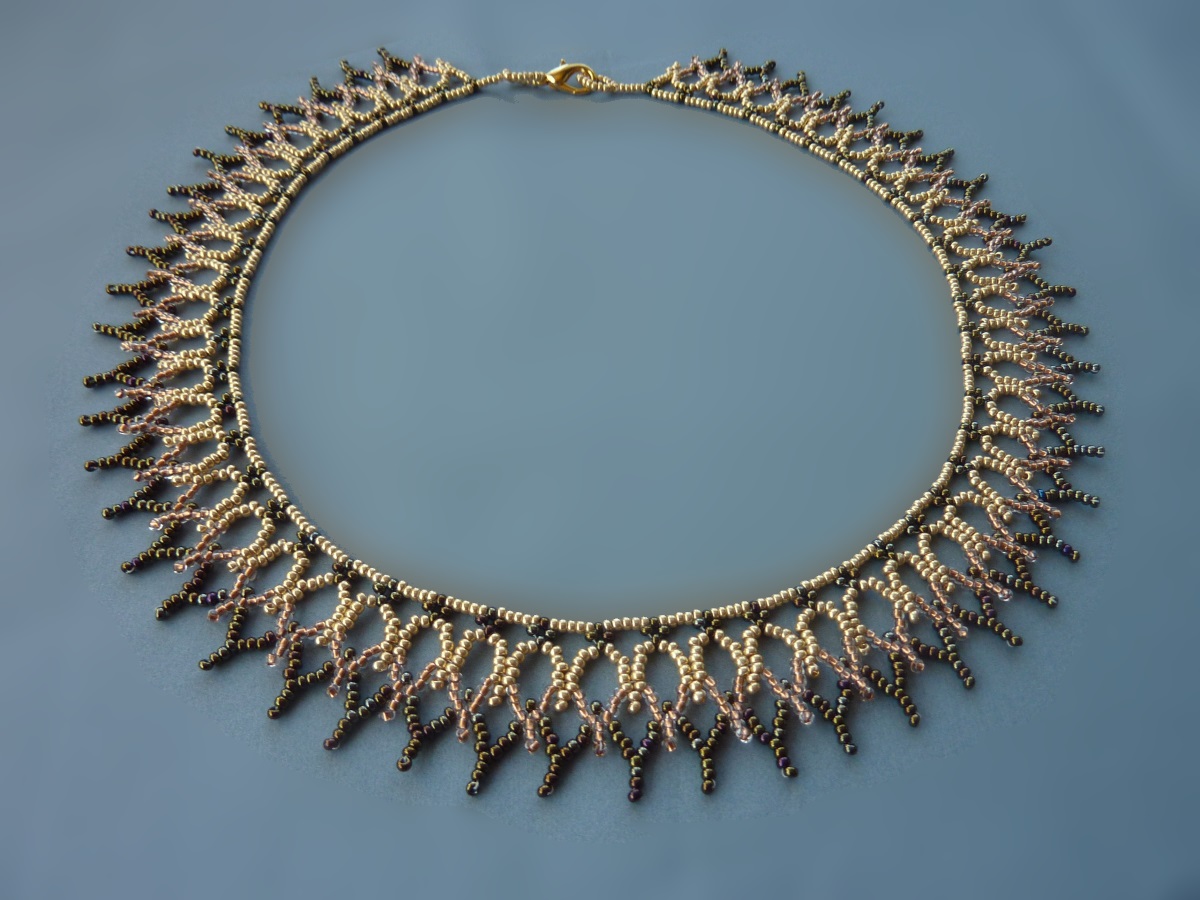
Click on the photos below (or the free beading pattern) to zoom in.
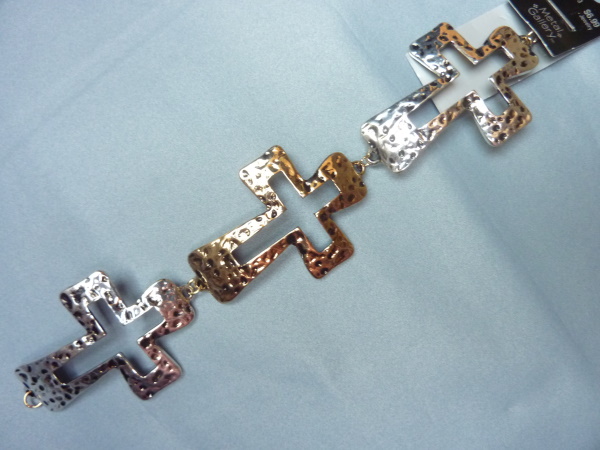
The original inspiration for this piece was a sale at Hobby Lobby, specifically this Metal Gallery piece:
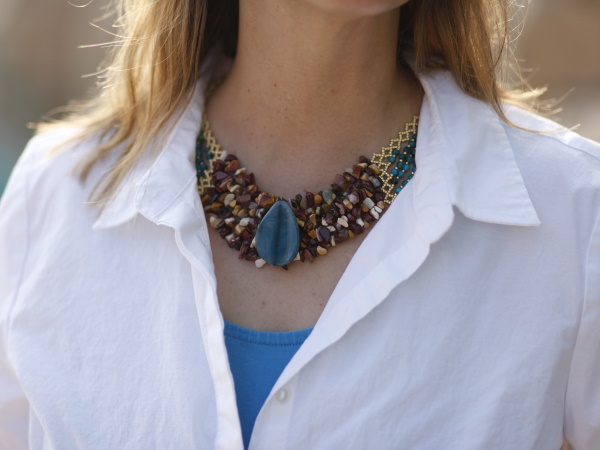
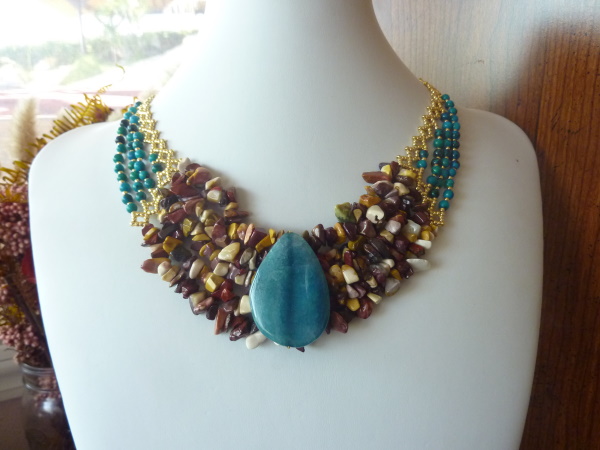
I thought this would be great as a focal point, with some natural stone. I have both drilled medium chips and round beads made of natural stone, so wanted to incorporate those somehow. I thought having the chips as a backdrop to the focal piece would be great, but they are too heavy to make an entire necklace out of with enough width for the focal piece to lay on top of. Plus I only had 30 inches or so of each chip variety. So what I finally came up with was more of a method than a pattern, which is easier to show with a mix of pictures and diagrams. Usually my PDF patterns are 1 page, but this one is 5 pages, to illustrate this method with images.
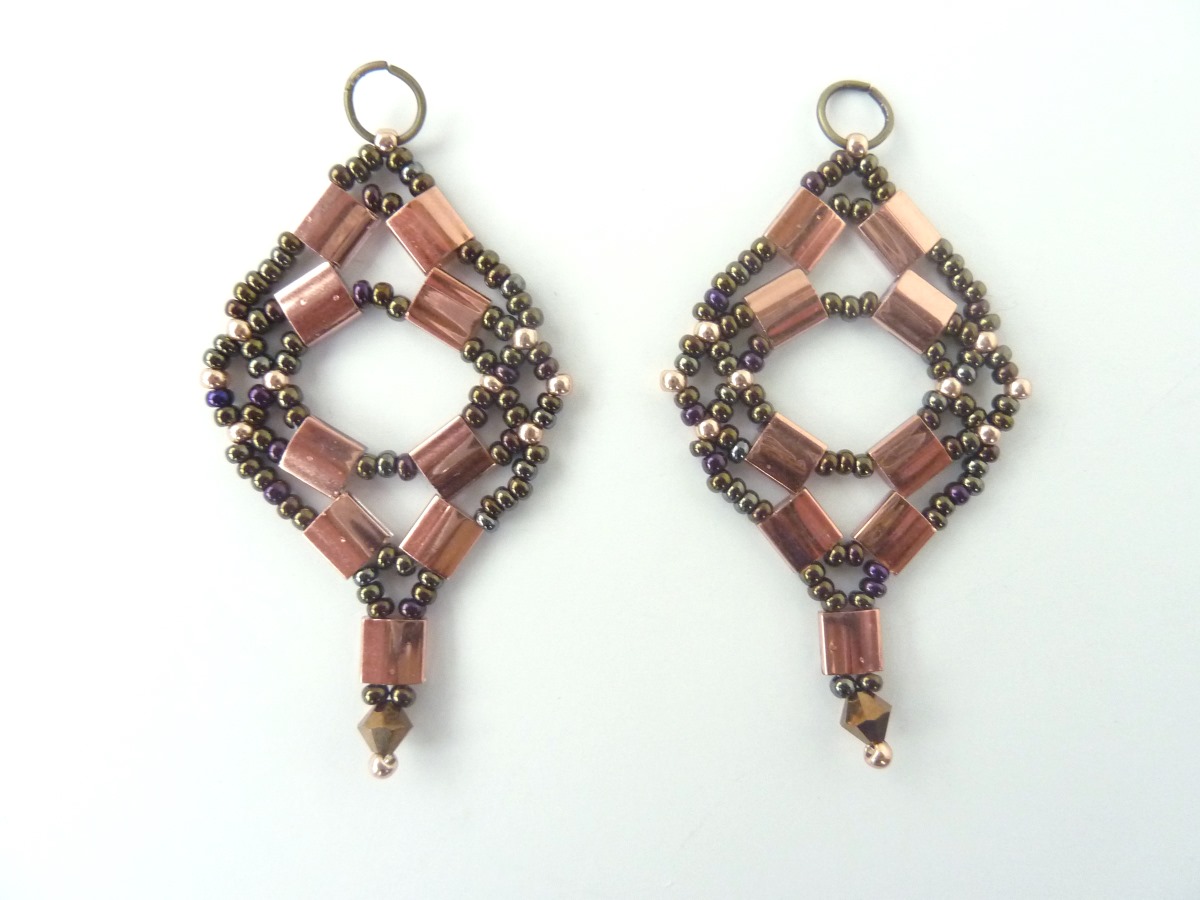
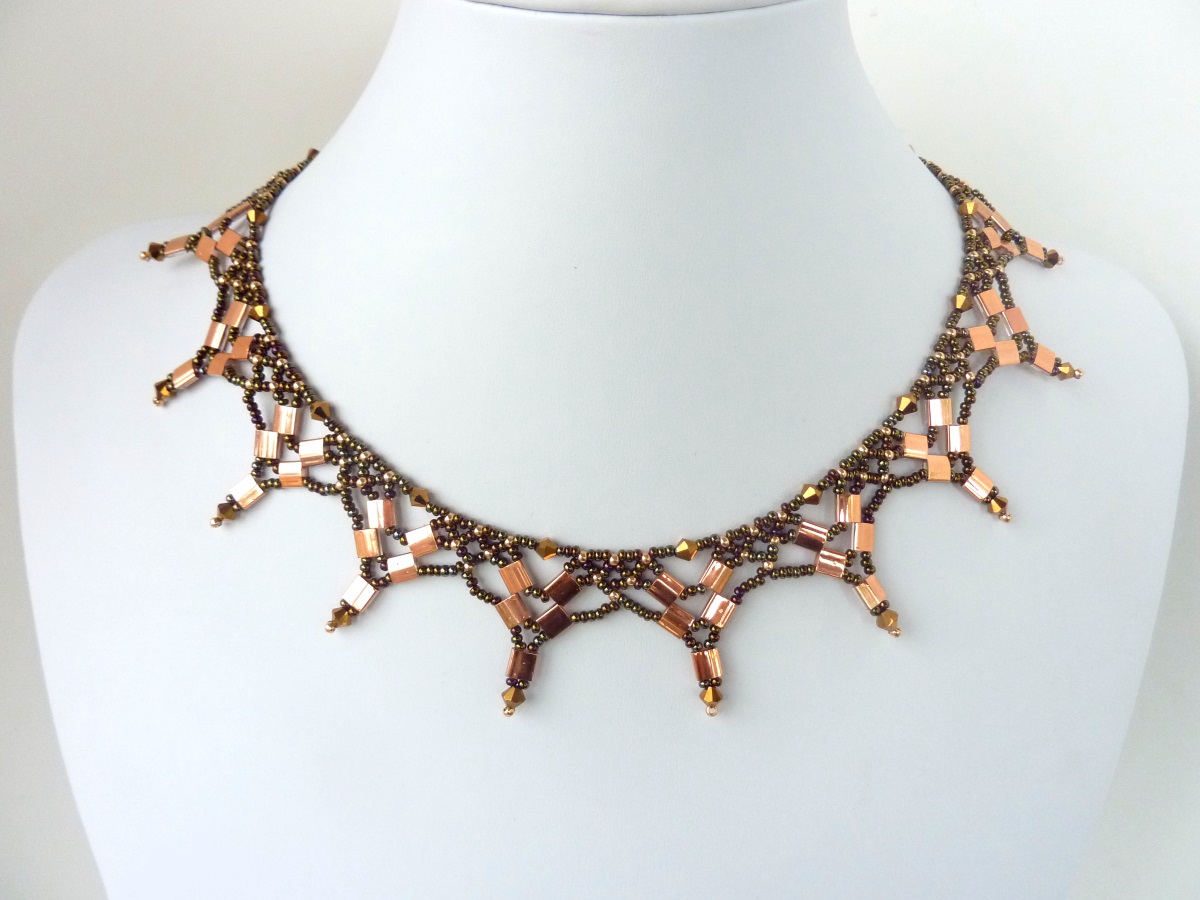
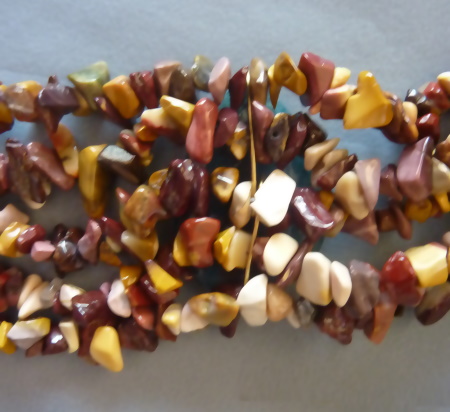
This pattern requires two 8/0 seed beads and jump rings for clasp, 11/0 seed beads, 4-mm round beads, 30-inches of medium drilled chip beads, and (optionally) a 1 1/2″ focal piece or bead (with 5 inches of 20-guage wire to attach).
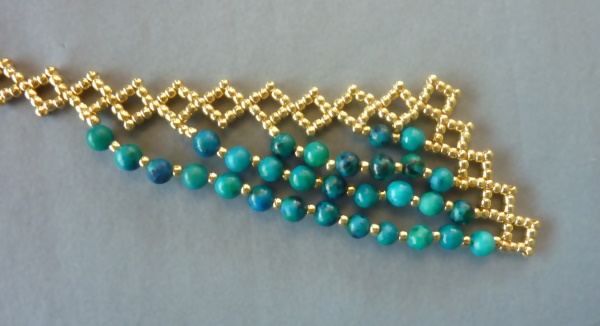
I started by making 2 end pieces (each in an L-shape) to frame the center chip section (shown in steps 1 – 10 below).
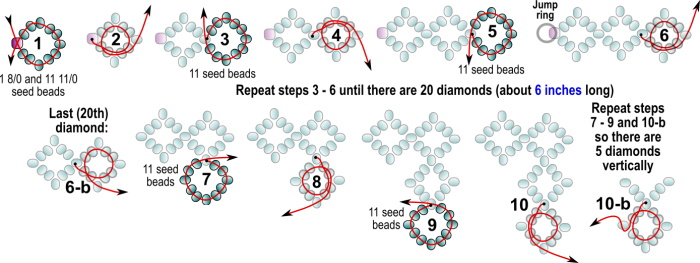
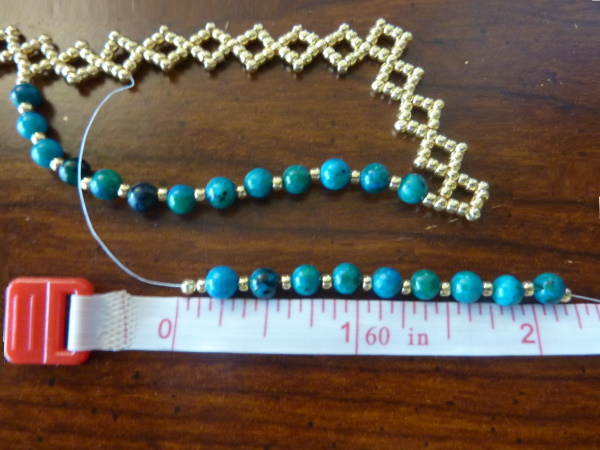
Then I added some decorative stability strands (with accent color), so the end components would keep their shape with the weight of the chips added later. The first outer strand is made of alternating 4mm round beads and seed beads, and should measure 3″ – 3 1/16″ long, connecting from the last vertical diamond, to the 9th horizontal diamond from the right. This ended up being 13 round beads for the aqua/gold piece pictured below, but 14 for the blue/silver piece (as the size of 4mm beads can vary).
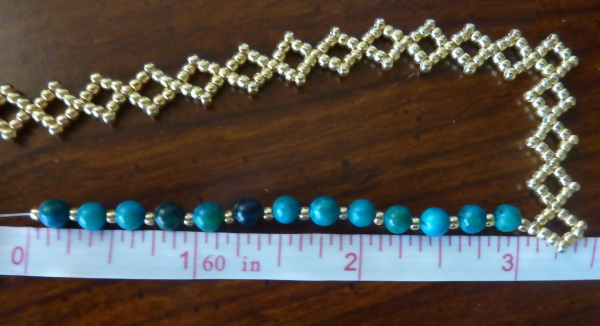
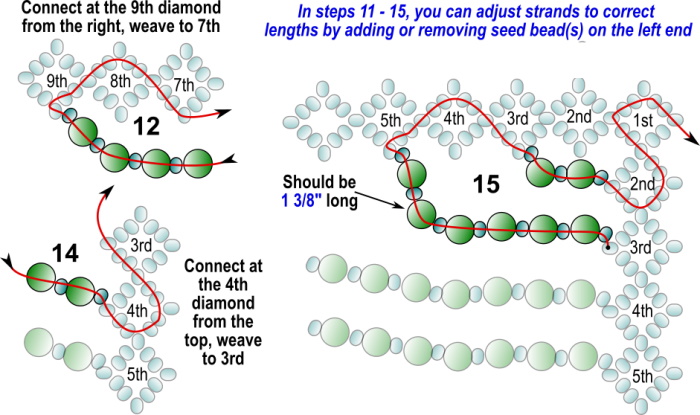
Connect the strand at the 9th horizontal diamond from the right (see diagram below, step 12). After step 12, the 2nd strand should measure 2 1/4″, and connect from the 7th horizontal diamond from the right to the 4th vertical diamond. This ending up being 9 round beads for the aqua/gold piece pictured below, but 10 for the blue/silver piece. (I adjusted the strand to the right length by adding an extra seed bead on the end, which can be done with any of the strands).
When diamond links are at 90 degrees, the 3 longer strands will have some slack.
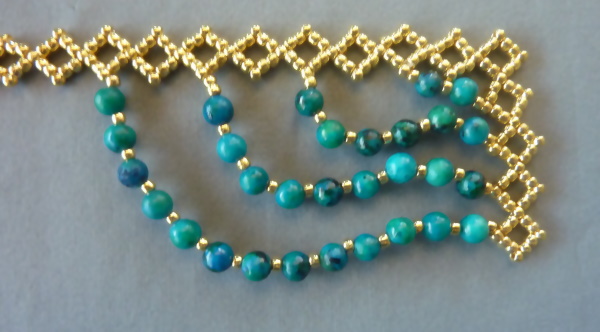
When you pull it apart past 90 degrees (as the gravity of the chip beads will do), the four strands should all be straight.
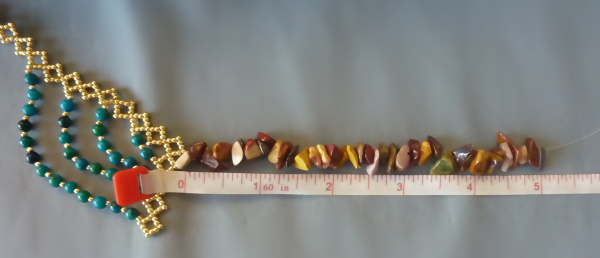
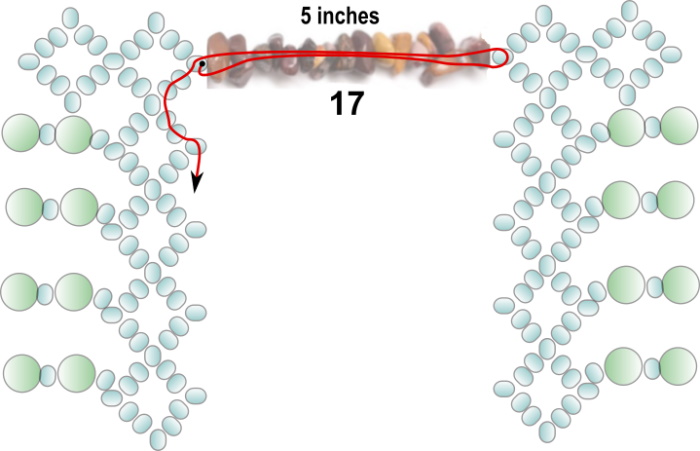
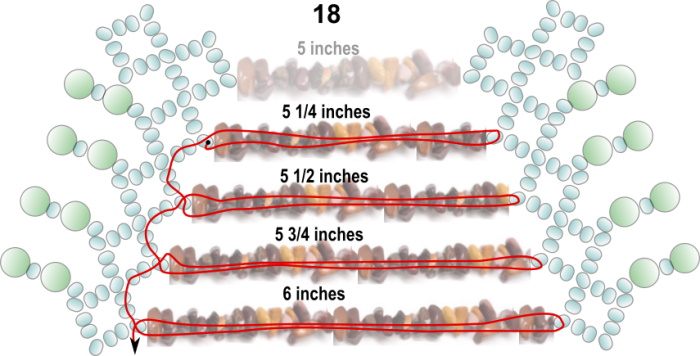
Next, string on 5 inches of chips.
Connect it to the other end component, per diagram below:
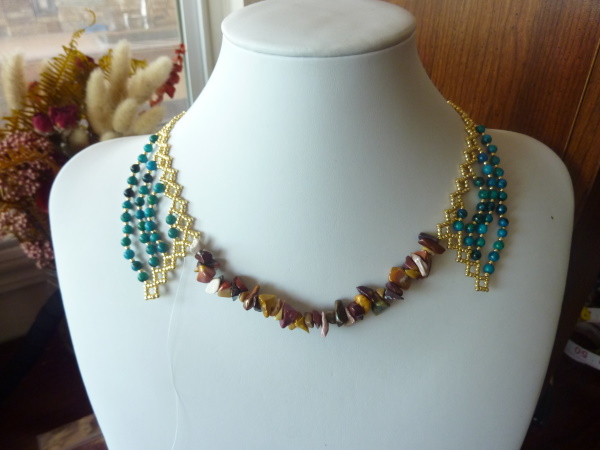
After connecting first row of chips, connect clasp with jump rings through 8/0 seed beads at either end, and place on a necklace display bust. (The weight of the chips can affect how long each of the next four chip strands will be, so it is good to finish the necklace while it is on the display bust).
As you add chip strands, ensure they are the right length so they lie close together without gaps or overlapping. (Step 18 indicates what these lengths were for my chips).
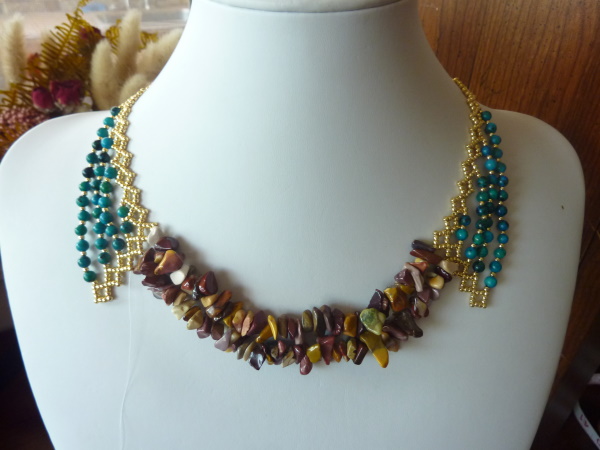
After the 5th strand, the weight of the chips will pull the end component strands straight. This can be the finished necklace, or you can continue to add a focal piece on top of the chips.

For the focal piece, first put about 5 inches of 20-guage wire through the focal bead, and bend the ends 90 degrees back on both sides.
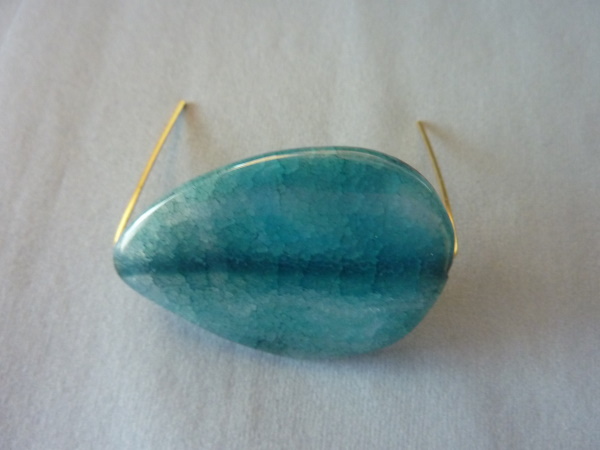
Put the necklace on the display bust backwards, then place the focal bead behind it. Be sure it is in the center.
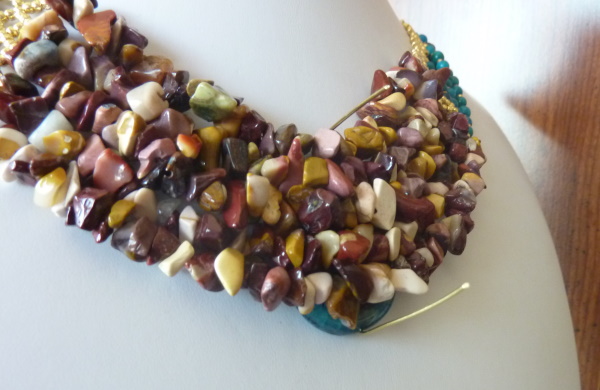
Bend the wires down with your thumbs, in between the chip beads. Use round nose pliers to curl the wire ends inward so they don’t poke out.
Put the necklace back on the display bust frontward, showing the focal piece. Enjoy the finished piece!
If you wish to print the pattern, download it in PDF format:
If you enjoy the free designs, tutorials, and downloads provided by BeadDiagrams.com, consider donating using Paypal!