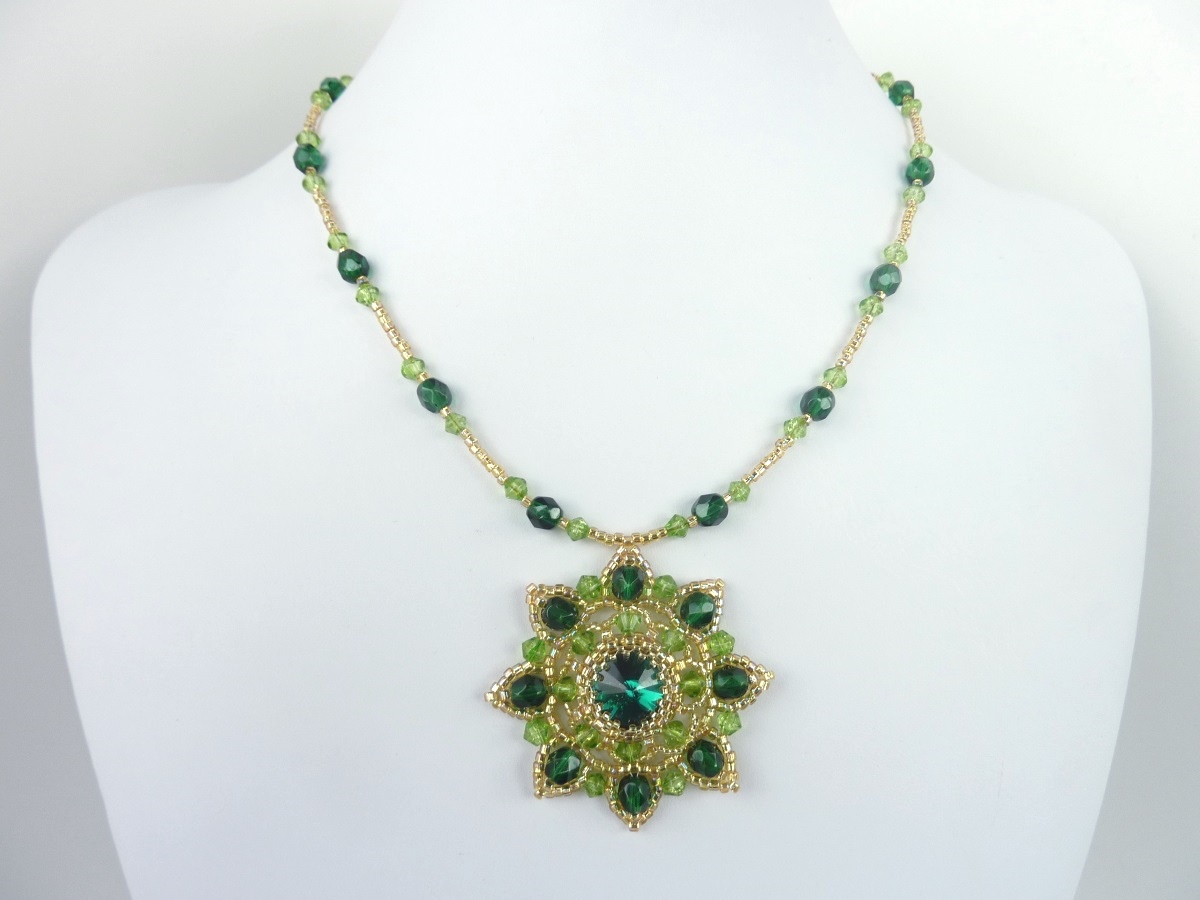
This pattern was modified from a free Russian tutorial posted at http://biser.info/node/353793 for a lovely 14mm rivoli pendant surrounded by 4mm and 6mm green crystals. My modified version of the pattern starts the rivoli bezel with a peyote stitch instead of right angle weave, which changes the number of surrounding crystals to 8 instead of 10, allowing room for additional crystals in the outer row. This diagram also includes a pattern for a strand which coordinates nicely with this pendant, as an alternative to a gold chain. The piece below was made using an emerald green 14mm rivoli, 6mm round emerald green crystals, 4mm light green bicone crystals, and 11/0 and 15/0 gold seed beads. The strand was made with the same beads using beading wire, crimp beads, and clasp on the ends.
Note: If you have trouble with the beginning of the pattern, visit http://www.aroundthebeadingtable.com/Tutorials/PeyoteBezel.html, which has a more detailed picture and diagram tutorial of the same exact process depicted in steps 1 – 6 of this diagram.

FREE beading pattern: Star Rivoli
Click on the photos below (or the free beading pattern) to zoom in.
If you wish to print the pattern, download it in PDF format:
If you enjoy the free designs and downloads provided by BeadDiagrams.com, consider donating! (Just click the “Donate” button on the right sidebar to donate using PayPal).

I have a big problem following patterns, but wanted to ask about Step 3 looks like a row of 15/0 is added. Step 4 still showing that row, but Step 5 it is not there and I do not see it in any of the other steps. Is this row necessary or should it not be added at all? It is probably just my inability to follow patterns that is making it appear this way. Please clarify this for me, as I love this pattern and would love to try it.Thank you very much for any advice on this step.
When you tighten the 15/0 rows (made in steps 3 and 4), they form a “cup” and go behind the 11/0 ring where you can’t see them. It is difficult to show this in a 2D diagram, but I’m glad to have your feedback, so I can try to make things clearer in future diagrams. In the meantime, you can visit http://www.aroundthebeadingtable.com/Tutorials/PeyoteBezel.html which has a better more detailed picture and diagram tutorial of the same exact thing shown in steps 1 – 6 of this pattern.
This is gorgeous. Thank you so much. I am a new student on beading.